DigitalNetHosting

Loading

Can’t remove Vipre Antivirus -Windows 7 Support

Do you want to uninstall Vipre Antivirus from your PC with Windows 7? This step-by-step guide shows you how to completely remove all the components and files of Vipre Antivirus in Windows 7.

Here are steps:

1) Click the start button on the desktop;

2) Click control panel and the control panel window opens;
3) Click Uninstall a program and the installed programs window appears;
4) Click the Vipre Antivirus program which you want to uninstall;
5) Click Uninstall (or uninstall/change);
6) Follow the instructions on the screen to get rid of Vipre Antivirus completely. Notice that if the instructions ask you to exit the current running Vipre Antivirus program, you can find the programs icon on the system tray and then click the icon and choose exit. In that way, you’re able to exit the program and continue your uninstall procedure;
7) A reboot may be required then just go ahead to ensure the complete removal.

That is all for the guide. Usually, if you follow the above instructions, you will be able to remove the unwanted Vipre Antivirus program completely on Control Panel.

If you fail to remove Vipre Antivirus by following the above steps, here is alternate solutions for removing Vipre Antivirus if you can’t remove it on Control Panel:

1) Remove Vipre Antivirus Online

It is a good solution to everybody. Online PC repair is becoming more and more popular recently. After some simple clicks and giving your permission to the remote connection, you can enjoy watching all kinds of PC problems being solived by PC experts remotely and conveniently.

2) Using Vipre Antivirus removal tool

There is special removal tools for deleting Vipre Antivirus completely. If you want to use it, please pay attention to the version of Vipre Antivirus that you had so that you can find the proper removal tool.

Source by selina_999

How to Uninstall and Remove Symantec Enterprise Vault?

Are you in a need to completely uninstall and remove Symantec Enterprise Vault but you really having no idea how to do it? If so, you are not alone.

Most of the time, when you try to uninstall and remove Symantec Enterprise Vault in the add/remove programs list entering from the Control Panel, you may not find it there. So it does not permit you to delete it. Even though you have uninstalled it, it still may start up automatically when you log on. Then you have to disable it from task manager each time you log on. Does it sound frustrating? This is because the registry entries and the Symantec Enterprise Vault related files respectively remain hidden in the nooks and corners of your registry and hard drives.

Then I’ve setup a step-by-step Symantec Enterprise Vault removal plan for you so you can conduct the removal as soon as possible.

However, whether you want to remove this program, note that this will result in no protection for your PC. Then be very carefully when browsing the internet.

Method 1 Uninstall and remove Symantec Enterprise Vault manually

1. Locate and remove Symantec Enterprise Vault by deleting the related files, a trained software professional would better do this job.

2. Eliminate the registry entries if you can.

3. Delete connected directions.

By doing a quick search via the Internet, you can find out what files and registry entries need to be deleted. But this removal is only recommended for computer experts, for deleting the wrong file or registry key may render Windows unbootable.

Method 2 Uninstall and remove Symantec Enterprise Vault automatically

There is a much simpler and safer way to conduct Symantec Enterprise Vault removal, and what you need is a security tool removal tool. This tool can uninstall the program firstly, and then it scans your registry and your hard drives to find and delete all the files that related to the program, easily and effectively.

There is actually a fantastic removal tool that can help you remove Symantec Enterprise Vault completely with great success and make sure all the now-defunct Registry entries and related files are eliminated automatically with a few clicks.

Source by ianchan1985

Quickorder, the Free Software for Restaurant

QuickOrder is a new ordering system  for restaurant management. The program picks up orders and deliver them to the kitchen. It makes data entry easier.

You can control table map, menù and prices, stock in the store,.. In addition, you can take note about customer’s details and waiters, such as who waiter serves a that one table, etc.

 It takes note about customers’ details and waiters, stocks,… 

So you can keep everything under control easly.You can control accounting as well.

To sum up, the system incorporates the features that a restaurant uses many times every day and keeping it simple. 

This system can help to built a business restaurant and make customers happier, because it can increase efficiency orders and decrease time service. It can help you to save money. You have cash control and security to help you keep more the money you earn 

The restaurant software is designed for user friendly and graphic design is cool.  It is easy to use and fast: the graphics interface is very intuitive. The system has a wireless printer.

The software is open source, it operates on Linux (Ubuntu) and Mac. Soon it will available for Windows as well.

Company as a software house, vendors, hardware manufacturer can use the free QuickOrder to their business

You can download QuickOrder for free from:  

http://www.supereasyfree.com

You can look at an explanation video on:

http://it.youtube.com/watch?v=t1SqDvbadiQ

Source by anonymous

Windows Registry Repair Software: Freedom to Manage your Data

A Windows registry is an information tank that stores all information about operating system hardware and all other softwares residing in your PC. Working similar to heart in human body, it pumps out the information to be used as instructions while running any program. With passage of time, it gets cluttered and need a fix. Thanks to windows registry repair software that gets into action to avid the malfunctioning and crashes of PC.

This windows registry repair software scans the information and makes necessary changes analyzing, detailing and removing the useless information. Various functions that are carried to improve stability and performance of system are:

  • Cleaning windows registry and fixing error (if any).
  • Prevent crashes, reboots and lock-ups.
  • Increase your computer stability and ability to perform

Well, a good news is that the windows registry repair software is available for absolute no cost, that is, it has now been the window registry repair freeware. Many websites and companies are providing windows registry repair free downloads. However, the registry repair software may be distinguished at each site.

Well, commonly recommended registry repair softwares may be lined up as:

  • Tune-up Utility: it is considered to be the most complete software in the market with the benefits of defragging the registry.
  • Registry Mechanic: a simple utility checker fixing most common of problems seeks to be more focused at its work.
  • XP Repair Pro: it is advanced registry software that is quiet quick, smooth in its functioning and effective. Its benefit lies in its ability to provide great graphical user interface design.

However, a common benefit with all these software lies in the re-location of deleted information if the user feels uncomfortable. Hence, with this software user can enjoy the freedom to manage the data clutter free.

Source by Arvind

How to Set Background Music for a Powerpoint File?

What is PowerPoint? As we know, PowerPoint is really amazing software from Microsoft. Microsoft PowerPoint is an application for creating presentations, A PowerPoint presentation is formatted like a slide show, and accordingly, the basic unit of the PowerPoint presentation is called a “slide”. As you make an oral presentation, you can click through the slides to reinforce your ideas. PowerPoint presentations can also be presented without accompanying oral discussion or printed out as briefing books for a meeting. 

Therefore, more and more people learn and seek to design a good PowerPoint file day by day. So then to meet more and more people’s requirement, here I also would like to join in to share some knowledge with you!

Refer to how to design a good PowerPoint, there is a function you must use. That is how to set background music for a PowerPoint file. 

Insert music/sound file into a PowerPoint

  • Open a PowerPoint file
  • On the Insert menu, point to Movies and Sounds, and then click Sound from File.
  • Click the music or sound file you want to insert and then click OK.

·Tips: Always put the music/audio file in the same folder as your PowerPoint presentation. If you later move the PowerPoint presentation to another computer, copy the music/audio file too. Keeping your music/sound file in the same folder as your presentation ensures the link will still work. However, you should always test the music/audio file on a new machine just to be certain. Re-insert the music/audio file, if necessary.

  • After you click OK, you’ are promoted with a message asking how you want the music/audio file to start in the slide show. Choose Automatically


Set the music as the background music for the PowerPoint

  • Right-click to the loud-speaker icon on the slide, find Custom Animation and click it.
  • Check this added music animation sequence under Custom Animation. Make sure that this added music file is placed in the primary of all the animations sequences. If not, drag it to the primary.
  • Right-click the added music animations sequences and find Effect Options and click it.  


  • After click Effect Options, there would a window named Play Sound pop-up.
  • Find Stop playing and check After, and then specify a value bigger than the quantity of the slide quantity of the current PowerPoint file. In other words, if there are 10 slides contained in this PowerPoint file, you have to specify a value >10, 11 or 12.  


  • Click Timing tab under the Play Sound window.
  • Find Repeat under this tab, click Drop-down button.
  • Choose the option of Until End of Slide.
  • Click OK button.  


Then the music audio file is played from the very beginning of the PowerPoint file to the very end of the PowerPoint file as the background music, and you can test this effect by click icon. 

After this function using, I can sure that your PowerPoint file would be much more exciting and interesting.

Source:http://www.dvd-ppt-slideshow.com/powerpoint-knowledge/set-background-music.html

Source by Stephen Wong

Software Solutions Florida

Software solutions the term covers a wide range of services and developments offered by the growth of information technology in today’s world. To start with the websites are designed today for the growth and marketing of any business and forms an integral part of online marketing presence. There is web designing done using HTML, XHTML, CSS, Javascript, PHP, ASP, NET, Java and Flash. The websites developed are dynamic and provide easy navigation to the users with rich content. The web applications developed provide automation process for different sectors and industries which are used by them to increase their efficiency from time to time.

The process of web application development goes through the procedure of functional testing, load testing, accessibility verification, and code validation. The solutions provided these days are highly customized to adapt to the time needs. They can be changed accordingly if required so that they fit in the development process. These solutions include Customer Relationship Management systems, E-Commerce systems, and Intranet, Extranet and Portal solutions, Database application, Payment and Financial applications. These applications are developed with graphic user interfaces which are user friendly and with the functionality that can be grasped easily by the clients or the customers.

Then there are web hosting solutions providing Windows .net server 2003, Cold Fusion, LINUX ES 3.0 and E-mail hosting options. An efficient web hosting solution certainly reduces the cost with an increase in the market space and high level sales. There are multiple software solutions available. There are a number of web hosting services in use like free web hosting, shared web hosting, dedicated or managed hosting services .The user can choose the services as per the requirements. Finally it can be said that multiple software solutions have not left any field untouched by its impact whether you take a growing organization into consideration or small industries trying to pace up with the IT revolution.

Source by Rakhi Chowdhary

The Importance Of Network Management

One of the major problems faced by IT companies is related to the management of their IT assets. There are many areas which need to be managed well which include network monitoring, network management and several other related networking devices and assets. If you are worried on how to manage your software resources, you will just have to scan different websites to get excellent hardware management software which can help you to manage all your assets.

One of the most trusted sources which can help you with your software management is Spiceworks. This is one of the best online sources from where you can learn how to manage your software and why it is so essential to manage your software so well.

You might have faced problems related to inventory management – this might range from issues related to tracking of network device, device compatibility issues, updates, renewals and rentals of software and other tools– everything will be taken care of by your inventory management software. If you are stuck with problems related to PC installation or software installation problems, your inventory management software is surely going to help you. You no longer have to get worried when you are stuck with problems related to your workstation, its routers, different switches and even other different servers. You just have to ensure that you are using the right hardware management software.

Other tasks related to maintenance and inspection of the productivity and working of your different assets shall be done by your hardware management software. Thus, users do not have to spend extra time and money on maintenance and management of IT devices when they are using such software. With the help of such software management tools, it becomes possible to monitor any type of network, exchange lessons and also take care of licensing issues and factors. The task of maintenance in such cases becomes much easy and comfortable. You can also get various types of reports related to your inventory which includes report on different assets and inventory, information on different types of network metrics and also report on inventory.

Reports on the working of your IT assets are extremely important without which it is not possible to know about the working of your software. Your hardware management software takes care of all such reporting tasks and keeps you updated on your PC devices and other installations. You are reminded when your software or any device needs an update and when it is important for you to track down different tasks.

It is very easy and convenient to start using and manage any such kind of software. If you are able to get the right hardware management software, you will probably be having the best type of network management solution for any type of need. This type of software is recommended to anyone who is in need of software management and is on the lookout for a very simple management tool for the management of various network resources. You will just have to learn about its compatibility with your system and get started as soon as possible.

It is as simple and as easy as that.

Source by Noah Houde

Checklist: How to Hardening IIS Servers

Web  site and application code is becoming progressively more intricate. Dynamic Web sites and applications might contain defective code that leaks memory or causes errors such as access violations. Therefore, a Web server Application must be able to handle active manager of the application and able to handle runtime error and detect send response automatically to application server.

Microsoft includes unique capabilities for server administrators intended to appeal to Internet service providers (ISPs). It includes a single window (or “console”) from which all services and users can be administered. It’s intended to be simple to add components as snap-ins that you didn’t at first install. The administrative windows can be customized for access by individual custom

Use the following checklists given below to ensure that you have correctly implemented all security settings and actions given

Configuring Active Directory IIS Server OU Structure

  • Create the IIS Servers OU.
  • Create the Incremental IIS Server Policy
  • Link the GPO to the IIS Servers OU
  • Import the security template for the corresponding client environment into the newly created GPO.

IIS Server Hardening Steps:

Install and configure Windows Server 2003.

Install and configure IIS services:

  • Install only necessary IIS components.
  • Enable Only Essential Web Service Extensions.
  • Place Content on a Dedicated Disk Volume.
  • Configure NTFS permissions.
  • Configure IIS Web Site permissions.
  • Configure IIS logging.

Apply any required service packs and/or updates.

Install and configure a virus protection solution.

Install and configure MOM agents or similar monitoring solution as required.

Move appropriate server to the corresponding IIS Servers OU.

  1. Secure well-known accounts           Rename the built-in Administrator account, assign a complex password. Ensure      Guest account is disabled. Change default account description.

Secure services accounts.

Consider implementing IPSec Filters.

Verify Incremental IIS Server Policy has replicated between domain controllers.

Run GPUPDATE.EXE /FORCE.

Restart the server.

Check the Event Logs for errors.

Source by Andrew Demmy

Setting Up Filters in Excel

It is no secret that Excel experts are constantly sent enquiries regarding the many commands and functions of the spreadsheet programme. A number of these enquiries can even take on a panicked tone. In a way, that is a positive occurrence. Why so? It would be better to have the extra functions and commands and learn about them as opposed to not having the commands in the first place. And yes, Excel is certainly a programme with many expansive capabilities.

That is why it is never easy to become an Excel expert and also why Excel experts are frequently in demand for their services. Among the many questions which are forwarded to such professionals, there is one question which appears frequently. This question is “How do I set up filters in Excel?” The process might sound complicated on the surface but it really is not. In fact, you could consider it fairly simple once you understand the basic directions to do so.

The purpose of filtering is to streamline your operation of the program. Rather than constantly have to manually operate commands or filling in date, Excel filters can be employed to automate many various functions. This can be a little tricky and complicated for some to perform which is why Excel experts receive scores of different requests to set up filters in Excel as well as modified Excel filters in Word.

There are several different ways individual filters and there may even different types of filters you can select from. However, the basic methods don’t vary too much from one another.

The following is a look at setting up default file filters from Word:

First, you will need to view the default file filter first. This starts with selecting the default file filter. This starts with one of the most basic and frequently visited of all menus: Edit. Once you are in Edit, you can then most to Preferences and then to Translations followed by Filters. Once you have entered into Filters, you can then move onto Formats. Once you have engaged the Formats command, the set up process will take on a new avenue.

At this point, the Formats dialog box will open. This will allow you to see the default filters that are present in the box marked “Available Formats.” Doing so opens the door to being able to select the default filter that you would prefer. Since you are seeking to create an Excel file filter you would select Default Excel Filter.
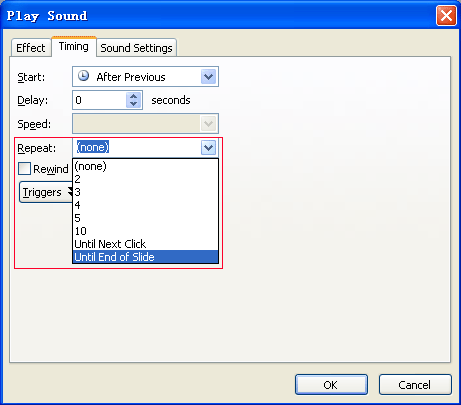
Filters in Excel

In Excel itself, you will need to set up the database that will employ the Advanced Filter option. This means you need to examine the first rows which maintain the alpha numeric headings of D1 and D 2. Then, you will look at the rows beneath them that have data and notice where there are no blank rows in the database. Then, there will be a blank row at the end of the database and an equally blank column on the right. Once you have created this configuration, you have a database to work with.

The next step here would be to set up the criteria range. In doing this you are essentially setting up values for the data that will appear when the filter is engages. There can be several criteria weaved into the mix here to create many filter options.

Common reasons this will be done is to take cells in the G1:G2 range and the make sure the heading in G1 has appropriately matched a D1 heading. G2 would maintain the criterion (selection) such as an “equal to” value sign.

At this point, once you have executed the Excel advanced filter option, only those items which are equal to can be seen.

Of course, this is a rather expansive command function and you can perform a great many more tactics than the “equal to” example.

Again, this is certainly not the easiest of functions to operate which is why Excel experts are consistently called upon to perform such tasks. Seeking help from such experts is advised if you wish to make the most of this command.

Source by Vincent Rogers

Types of user interfaces

User interfaces can be classified into the following three categories:

• Command language based interfaces

• Menu-based interfaces

• Direct manipulation interfaces

Command Language-based Interface

A command language-based interface – as the name itself suggests, is based on designing a command language which the user can use to issue the commands. The user is expected to frame the appropriate commands in the language and type them in appropriately whenever required. A simple command language-based interface might simply assign unique names to the different commands. However, a more sophisticated command language-based interface may allow users to compose complex commands by using a set of primitive commands. Such a facility to compose commands dramatically reduces the number of command names one would have to remember. Thus, a command language-based interface can be made concise requiring minimal typing by the user. Command language-based interfaces allow fast interaction with the computer and simplify the input of complex commands.

Menu-based Interface

An important advantage of a menu-based interface over a command language-based interface is that a menu-based interface does not require the users to remember the exact syntax of the commands. A menu-based interface is based on recognition of the command names, rather than recollection. Further, in a menu-based interface the typing effort is minimal as most interactions are carried out through menu selections using a pointing device. This factor is an important consideration for the occasional user who cannot type fast.

However, experienced users find a menu-based user interface to be slower than a command language-based interface because an experienced user can type fast and can get speed advantage by composing different primitive commands to express complex commands. Composing commands in a menu-based interface is not possible. This is because of the fact that actions involving logical connectives (and, or, etc.) are awkward to specify in a menu-based system. Also, if the number of choices is large, it is difficult to select from the menu. In fact, a major challenge in the design of a menu-based interface is to structure large number of menu choices into manageable forms.

Direct Manipulation Interfaces

Direct manipulation interfaces present the interface to the user in the form of visual models (i.e. icons or objects). For this reason, direct manipulation interfaces are sometimes called as iconic interface. In this type of interface, the user issues commands by performing actions on the visual representations of the objects, e.g. pull an icon representing a file into an icon representing a trash box, for deleting the file. Important advantages of iconic interfaces include the fact that the icons can be recognized by the users very easily, and that icons are language-independent. However, direct manipulation interfaces can be considered slow for experienced users. Also, it is difficult to give complex commands using a direct manipulation interface. For example, if one has to drag an icon representing the file to a trash box icon for deleting a file, then in order to delete all the files in the directory one has to perform this operation individually for all files – which could be very easily done by issuing a command like delete *.*.

Source by www.tuition.net.in